3.1 Netlify
As we just mentioned, Netlify allows you to quickly publish a website by uploading the public/ folder through its web interface, and you will be assigned a random subdomain *.netlify.com.32 This approach is good for those websites that are not updated frequently (or at all). However, it is unlikely that you will not need to update your website, so we introduce a better approach in this section,33 which will take you a few more minutes to complete the configurations. Once it is properly configured, all you need to do in the future is to update the source repository, and Netlify will call Hugo to render your website automatically.
Basically, you have to host all source files of your website in a GIT repository.34 You do not need to put the public/ directory under version control35 because it will be automatically generated. Currently, Netlify supports GIT repositories hosted on GitHub, GitLab, and BitBucket. With any of these accounts, you can log into Netlify from its homepage and follow the guide to create a new site from your GIT repository.
Netlify supports several static website generators, including Jekyll and Hugo. For a new site, you have to specify a command to build your website, as well as the path of the publish directory. Netlify also supports multiple versions of Hugo, so the build command can be the default hugo. The default version is 0.17, which is too old, and we recommend that you use at least version 0.20. To specify a Hugo version greater or equal to 0.20, you need to create an environment variable HUGO_VERSION on Netlify. See the Netlify documentation for more information. The publish directory should be public unless you have changed it in your config.toml. Figure 3.1 shows the settings of the website https://t.yihui.org. You do not have to follow the exact settings for your own website; in particular, you may need to change the value of the environment variable HUGO_VERSION to a recent version of Hugo.36
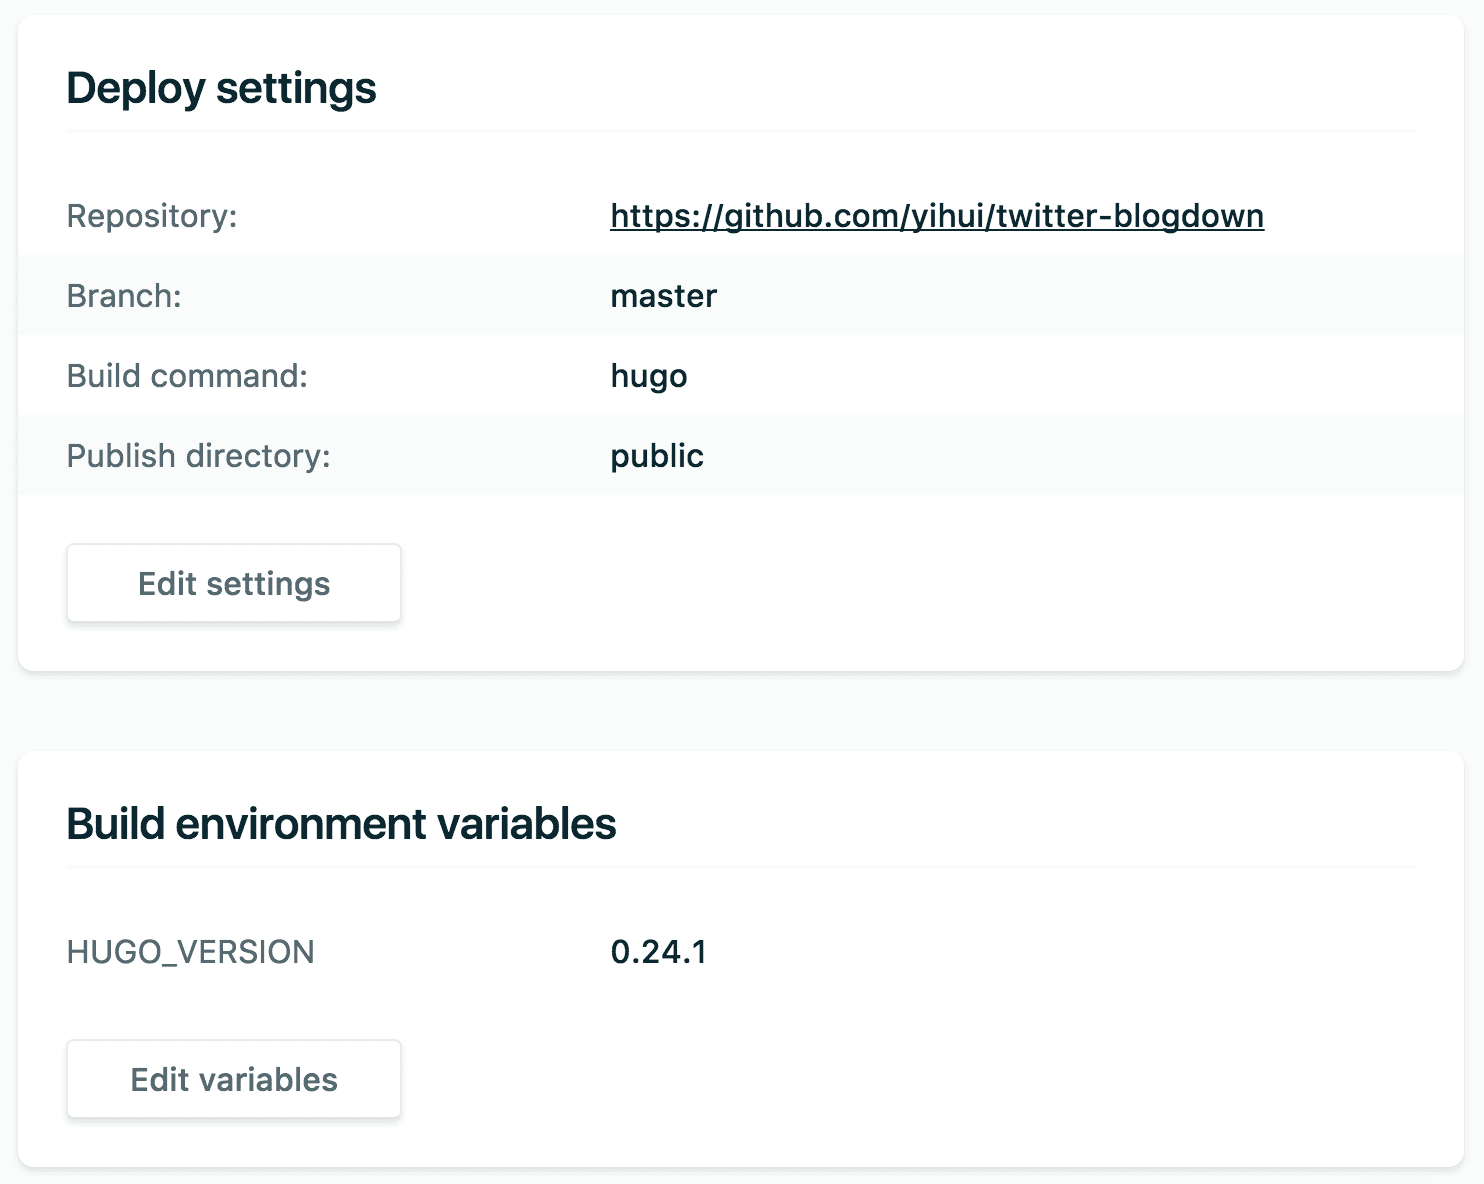
FIGURE 3.1: Example settings of a website deployed on Netlify.
It may take a minute or two to deploy your website on Netlify for the first time, but it can be much faster later (a few seconds) when you update your website source, because Netlify deploys incremental changes in the public/ directory, i.e., only the newer files compared to the last time are deployed.
After your GIT repository is connected with Netlify, the last issue you may want to solve is the domain name, unless you are satisfied with the free Netlify subdomain. If you want to use a different domain, you need to configure some DNS records of the domain to point it to the Netlify server. See Appendix C for some background knowledge on domain names.
If you are not familiar with domain names or do not want to learn more about them, something to consider is a free subdomain *.rbind.io offered by RStudio, PBC. Please visit the Rbind support website https://support.rbind.io to learn how to apply for a subdomain. In fact, the Rbind organization also offers free help on how to set up a website based on blogdown, thanks to a lot of volunteers from the R and statistics community.
Netlify is the only solution in this chapter that does not require you to prebuild your website. You only need to update the source files, push them to GitHub, and Netlify will build the website for you.37 The rest of the solutions in this chapter will require you to build your website locally and upload the public/ folder explicitly or implicitly. That said, you can certainly prebuild your website using any tools, push it to GitHub, and Netlify is still able to deploy it for you. What you need to do is leave the build command empty, and tell Netlify your publish directory (e.g., Hugo’s default public/, but if your prebuilt website is under the root directory, specify . as the publish directory instead). Then Netlify simply uploads all files under this directory to its servers without rebuilding your website.
You don’t have to keep the
*.netlify.comdomain. See Appendix C for more information.↩︎Please bear in mind that the purpose of this section is to outline the basic steps of publishing a website with Netlify, and the technical details may change from time to time, so the official Netlify documentation should be the most reliable source if you have any questions or anything we introduced here does not work.↩︎
If the contents of your
blogdownsite are not in the root directory of your GIT repository, Netlify will not build.↩︎You can add
publicto.gitignoreto ignore it in GIT.↩︎By the time when this book is published, the version 0.24.1 may be too old.↩︎
This is called “continuous deployment.”↩︎